
If you’ve ever had a thought of tricking or probing with your Android device, you’ve probably read that you need to flash a custom recovery onto it before you can do something. But, that gives new questions — What’s a custom recovery? What are my options? We’re going to take a look at recoveries so that you can be well-informed before you start messing with Android device.
What’s a Recovery?
An Android device consists of several pieces of software, which includes the bootloader, radio, recovery, and system. The bootloader is the first piece of software that is run when your device turns on, it decides whether to load the recovery or load Android system and the radio. The radio is simply the controller for your antennas, which give you a cellular connection from carrier towers.
The recovery simply is a runtime environment ( “ a mini operating system”) separate from Android that can perform various system-related tasks.
Basically, the recovery comes with your device preloaded by the manufacturer is referred as Stock Recovery.The stock recovery on most Android devices can apply OTA (over-the-air) updates, delete user and cache content (for factory reset purposes), and allow external tools from a microSD card to run functions on the device
And a Custom Recovery?
A custom recovery is which people can install instead of stock recovery. There are many reasons installing a custom recovery.Most of the major features include:
The ability to install third-party ROMs, to perform Nandroid and Titanium backups, these are very good backups that save literally everything from your personal data to the operating system itself
for story short, custom recoveries allow you to do various things that the manufacturer may not want you to do with it. They make the stock recovery so limited for the sake of making sure that you don’t mess up with it, but you know what you’re doing, right? or else ur you device will be in danger I mean it may be Bricked.
CWM and TWRP
The top two most popular custom recoveries are ClockworkMod (CWM) and Team Win Recovery Project (TWRP). Both of these recoveries are fantastic choices and come loaded with features. Both projects boast a long list of supported devices, so you should be able to find a recovery made for your device.
CWM has been the recommended recovery for a long time and is still the most-used one, but TWRP has been gaining more popularity, because of its touch interface.CWM is menu-driven and comes with a boring interface and you control it by power and volume buttons, but it works well.

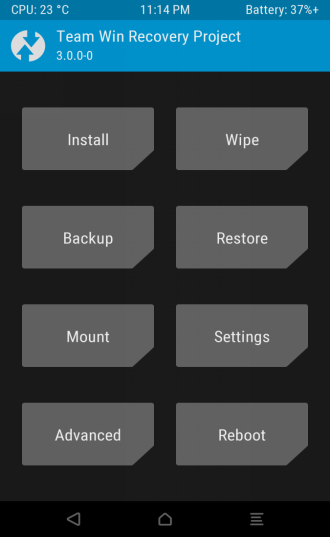
(images taken from XDA forum-CMW and TWRP)
TWRP is more dynamic with its large buttons and friendly interface, and it also guesses what you’ll want to do next:For example, after flashing a new ROM, it’ll replace one of the buttons with an option to wipe the cache and other related functions. It also stays in the folder you browsed to last, So you can have multiple related files you need to flash that are all located in the same folder.
Head over to the devices page of TWRP to find install instructions and download links of your specific device and we are providing you with most standard instuctions for most of device but we suggest you to verify with twrp process before proceeding.
You will need the platform-tools from the Android SDK. (OR) You can download only the platform-tools to get adb and fastboot binaries and install it on your computer.
Windows users will need proper drivers installed on their computer. You can try the ADB driversor the Universal ADB drivers and you must setup them.
On your device, go into Settings -> About and find the Build Number and tap on it 7 times to enable developer settings. Press back and go into Developer Options and enable USB debugging.
From your computer, open a command prompt and type:
adb reboot bootloader
You should now be in fastboot mode.
Download the correct image file and copy the file into the same folder as your adb and fastboot binaries. Don’t forget to Rename the downloaded recovery image to twrp.img and type:
fastboot flash recovery twrp.img
fastboot reboot
Note many devices will replace your custom recovery automatically during first boot. To prevent this, use Google to find the proper key combo to enter recovery. After typing fastboot reboot, hold the key combo and boot to TWRP. Once TWRP is booted, TWRP will patch the stock ROM to prevent the stock ROM from replacing TWRP. If you don’t follow this step, you will have to repeat the install.
If you’re more curious about other Optional Custom Recoveries , I suggest you to search for your device model and you can get Recoveries available on XDA developes site.
Thanks for visiting TechieSwag.If you have any doubts, Please Comment below.